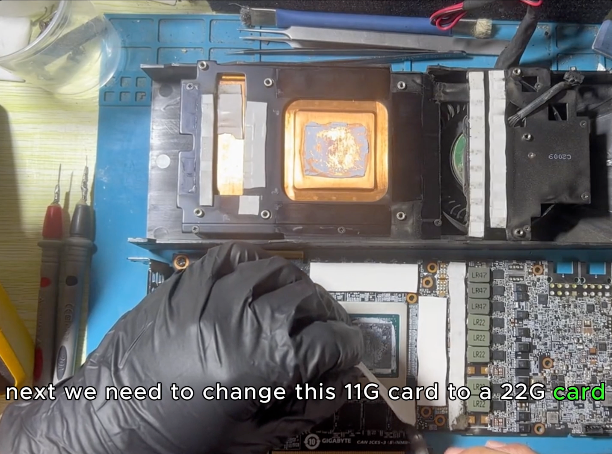
In this tutorial, we'll guide you through the process of upgrading your Gigabyte 2080 Ti from 11GB to a whopping 22GB. Follow these steps carefully to enhance your graphics card's memory capacity.
1. Inspect Your Graphics Card
Begin by examining your Gigabyte 2080 Ti 11GB graphics card to ensure you have the correct model.
2. Prepare for Modification
Utilize steel tape to insulate the core, providing a protective layer during the upgrade process.
3. Apply Soldering Grease
Apply soldering grease meticulously to all 11 memory chips on the graphics card board.
4. Remove Existing Memory
Use a heat gun to carefully remove all 11 memory chips. Ensure thorough removal without causing damage to the surrounding components.
5. Process the Pads
Once memory chips are removed, prepare the pads for the installation of new memory.
6. Install New Memory
Install single 2GB Samsung high-frequency video memory chips in place of the original 11GB configuration.
7. Test Memory Installation
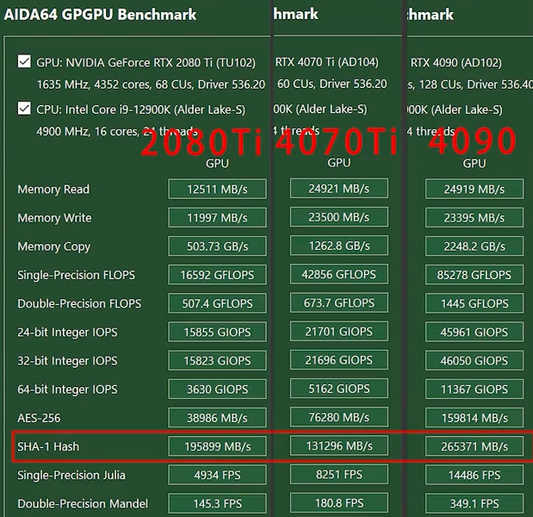
Utilize test software to scan the newly installed memory. Verify that all memory is recognized and functioning properly.
8. Modify Identification Resistor
Follow the provided drawing to change the identification resistor accordingly.
9. Clean Soldering Oil
Clean any remaining soldering oil around the memory area for a tidy and efficient modification.
10. Apply Thermal Pads and Grease
Install thermal pads and apply thermal grease to ensure optimal heat dissipation. This step is crucial for maintaining the graphics card's temperature.
11. Final Testing
Confirm the success of the upgrade by checking the card's capacity, which should now display as 22GB.
Conclusion
Congratulations! You've successfully upgraded your Gigabyte 2080 Ti graphics card from 11GB to an impressive 22GB. This step-by-step guide should help you navigate the modification process with confidence. Remember to exercise caution and precision throughout each stage to ensure a seamless upgrade.